在线文档
引入Swagger2的依赖
1
2
3
4
5
6
7
8
9
10
11
12
13
14
15
16
17
<!--swagger相关-->
        <dependency>
            <groupId>io.springfox</groupId>
            <artifactId>springfox-swagger2</artifactId>
            <version>${springfox.version}</version>
        </dependency>
        <dependency>
            <groupId>io.springfox</groupId>
            <artifactId>springfox-swagger-ui</artifactId>
            <version>${springfox.version}</version>
        </dependency>
        <dependency>
            <groupId>io.springfox</groupId>
            <artifactId>springfox-bean-validators</artifactId>
            <version>${springfox.version}</version>
        </dependency>
当然也要引入相关的spring-boot-starter,包括test。
定义一个Swagger Config:
1
2
3
4
5
6
7
8
9
10
11
12
13
14
15
16
17
18
19
20
21
22
23
24
25
26
27
28
29
30
31
32
33
@Configuration
@EnableSwagger2
@Import(BeanValidatorPluginsConfiguration.class)
public class SwaggerConfig {
    @Bean
    public Docket restApi() {
        return new Docket(DocumentationType.SWAGGER_2)
                .apiInfo(apiInfo())
                .securitySchemes(asList(
                        new OAuth(
                                "petstore_auth",
                                asList(new AuthorizationScope("write_pets", "modify pets in your account"),
                                        new AuthorizationScope("read_pets", "read your pets")),
                                singletonList(new ImplicitGrant(new LoginEndpoint("http://petstore.swagger.io/api/oauth/dialog"), "tokenName"))
                        ),
                        new ApiKey("api_key", "api_key", "header")
                ))
                .select()
                .apis(RequestHandlerSelectors.basePackage("head.swagger2markup.controller"))
                .build();
    }

    private ApiInfo apiInfo() {
        return new ApiInfoBuilder()
                .title("Petstore API")
                .description("Petstore API在线文档")
                .contact(new Contact("head", null, "452228391@qq.com"))
                .license("Apache 2.0")
                .licenseUrl("http://www.apache.org/licenses/LICENSE-2.0.html")
                .version("1.0.0")
                .build();
    }
}
注意一定要加上@EnableSwagger2注解表示启用Swagger2。它的作用是定义Api的overview部分,title、description、contact等等。然后生成一个Docket,定义了需要扫描的API包路径,还加入了安全验证,这里提供了OAuth和ApiKey两种方式,这部分还没好好研究,等以后有时间再看。
然后在代码中加入swagger的注解以提供相关说明信息,比如:
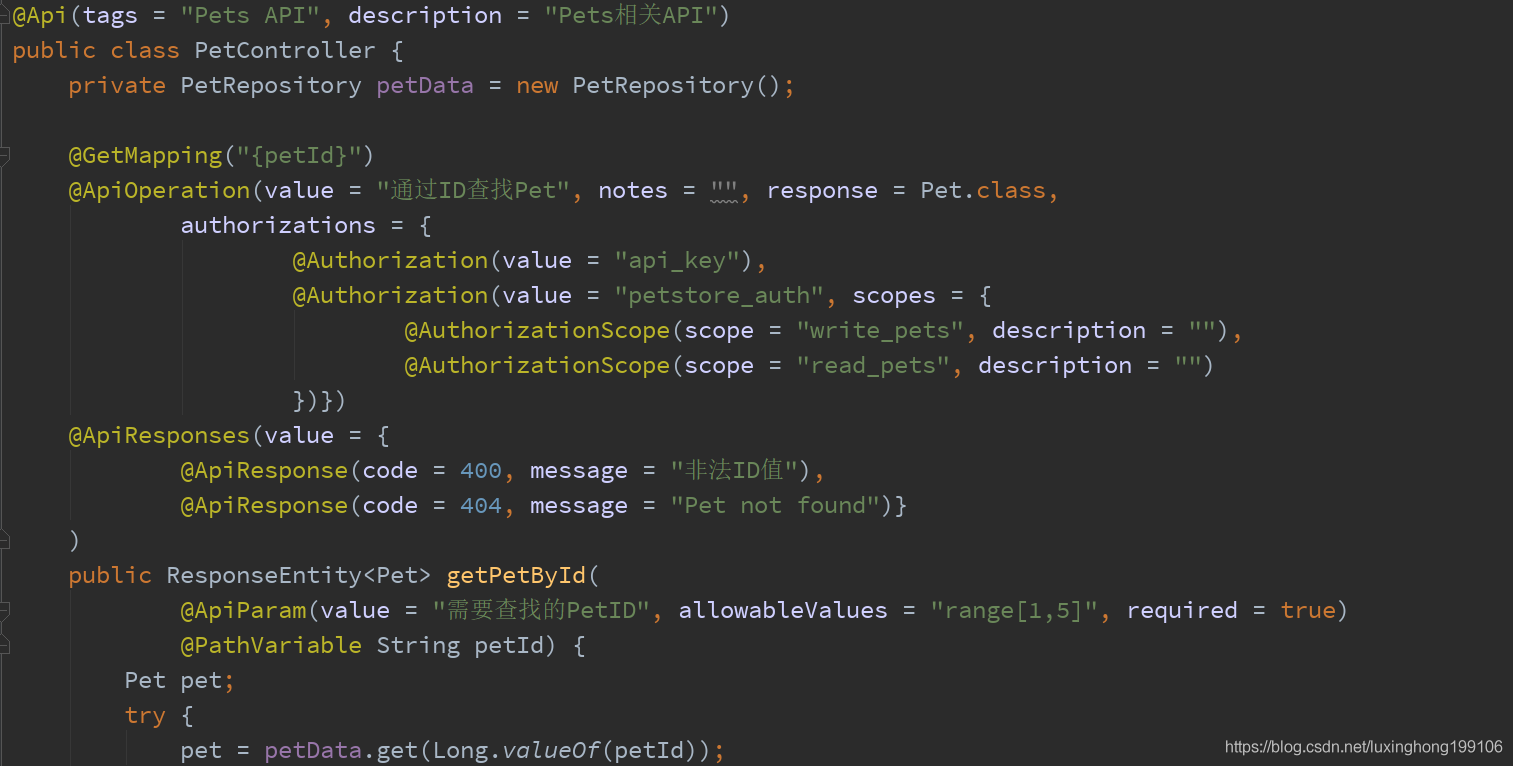
以Api开头的注解就是swagger相关注解,在类、方法、参数上都有对应注解以提供说明信息。
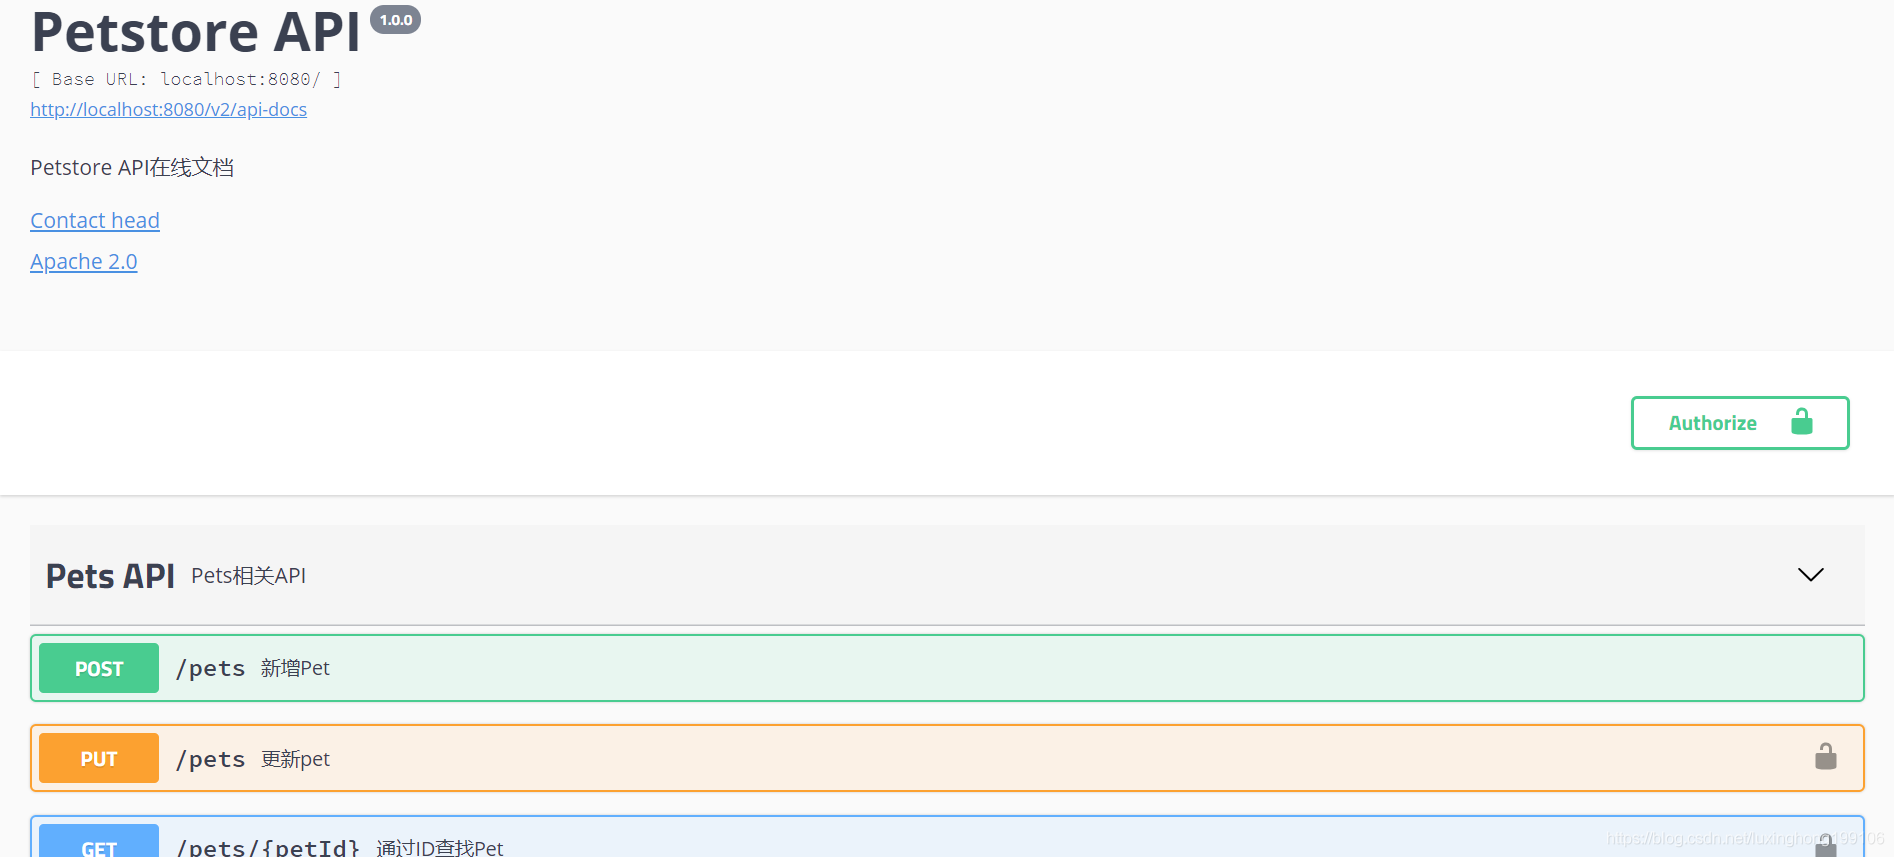
这时访问 http://localhost:8080/swagger-ui.html 就能看到在线文档了,提供了api说明和model实体类说明,点击try it out 还能进行在线测试。
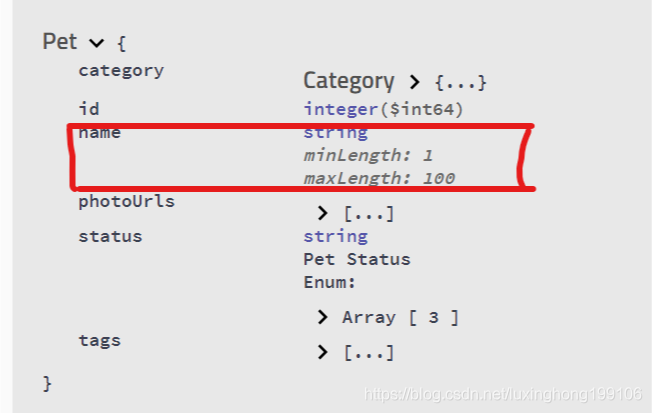
Swagger2还提供了对JSR303验证的支持,比如:
1
2
 @Size(min = 1, max = 100)
    private String name;
引入:
1
2
3
4
5
		<dependency>
            <groupId>io.springfox</groupId>
            <artifactId>springfox-bean-validators</artifactId>
            <version>${springfox.version}</version>
        </dependency>
在SwaggerConfig上加入@Import(BeanValidatorPluginsConfiguration.class),即可在文档中看到相关约束,效果如下:
离线文档
比如html和pdf格式,spring官方文档就是基于这种格式(asciidoc)。
swagger提供了一个url:http://localhost:8080/v2/api-docs ,返回了所有api的信息。
-
读取这个url,将结果存储到swagger.json:
1
2
3
4
5
6
7
8
9
10
11
12
13
14
15
    @Test
    public void createSpringfoxSwaggerJson() throws Exception {
//        String outputDir = System.getProperty("io.springfox.staticdocs.outputDir");
        String outputDir = "target/swagger";
        MvcResult result = mockMvc.perform(get("/v2/api-docs").accept(MediaType.APPLICATION_JSON))
                .andExpect(status().isOk())
                .andReturn();

        MockHttpServletResponse response = result.getResponse();
        String swaggerJson = response.getContentAsString();
        Files.createDirectories(Paths.get(outputDir));
        try (BufferedWriter writer = Files.newBufferedWriter(Paths.get(outputDir, "swagger.json"), StandardCharsets.UTF_8)) {
            writer.write(swaggerJson);
        }
    }
-
利用swagger2markup-maven-plugin插件读取swagger.json,生成一系列adoc文件。
-
写一个index.adoc文件,这个文件的内容基本是固定的。
1
include::{generated}/overview.adoc[] include::manual_content1.adoc[] include::manual_content2.adoc[] include::{generated}/paths.adoc[] include::{generated}/security.adoc[] include::{generated}/definitions.adoc[]
它就是用来包含上一步生成的adoc文件的,其中
manual_content1.adoc和manual_content2.adoc是自定义的,采用asciidoc格式,manual_content1.adoc如下:1 2 3 4 5 6 7
== 自定义章节 1 This is some dummy text === 子章节 Dummy text of sub chapter
-
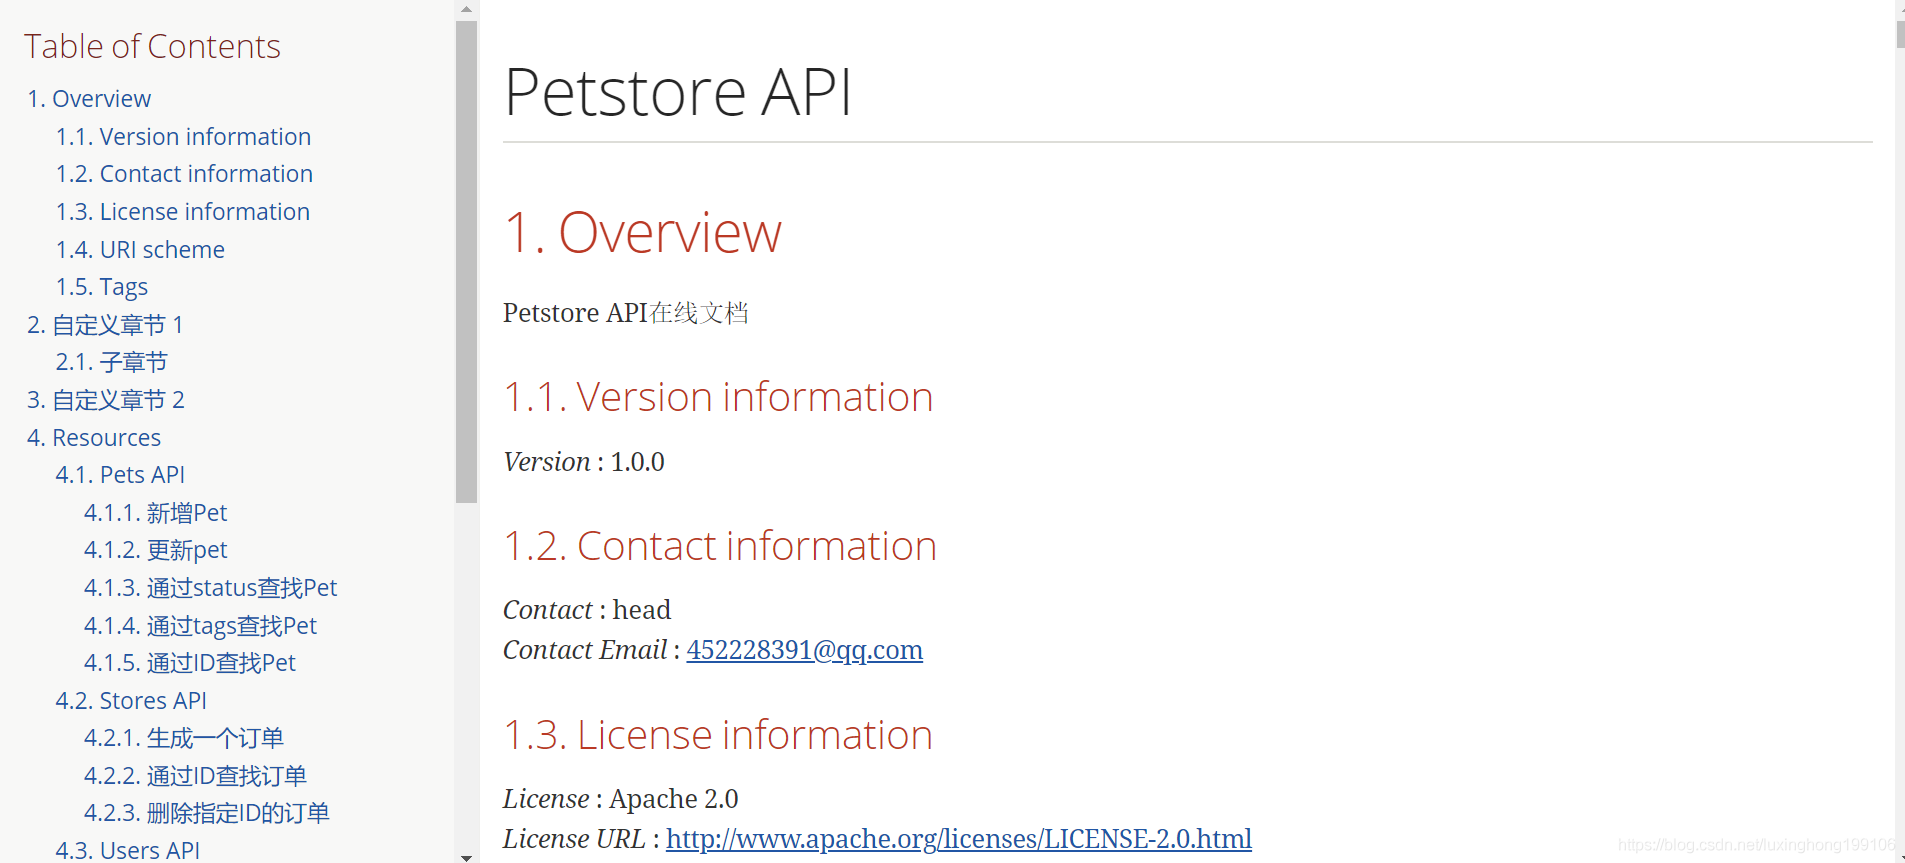
最后利用asciidoctor-maven-plugin插件将index.adoc文件转成html或pdf。
最终效果如下:
此时各个API是没有请求和响应示例的,需要用到spring-restdocs生成的snippets。snippets就是一段代码示例,通过springMvc Test生成。swagger2markup-maven-plugin 会将生成的snippets添加到adoc文件中。
步骤如下: 加入依赖:
1
2
3
4
		<dependency>
            <groupId>org.springframework.restdocs</groupId>
            <artifactId>spring-restdocs-mockmvc</artifactId>
        </dependency>
测试代码中添加对api的测试,比如这里测试addPet:
1
2
3
4
5
6
7
8
9
10
11
12
13
14
15
@AutoConfigureMockMvc
@AutoConfigureRestDocs(outputDir = "target/asciidoc/snippets")
@SpringBootTest
@RunWith(SpringRunner.class)
public class Swagger2MarkupTest {
    @Autowired
    private MockMvc mockMvc;

    @Test
    public void addANewPetToTheStore() throws Exception {
        this.mockMvc.perform(post("/pets/").content(createPet())
                .contentType(MediaType.APPLICATION_JSON))
                .andDo(document("addPetUsingPOST", preprocessResponse(prettyPrint())))
                .andExpect(status().isOk());
    }
document方法就是生成这个api对应的snippet。
最后mvn clean test,因为插件都是绑定到test上的,当然你可以绑定到其他生命周期。
效果如下:
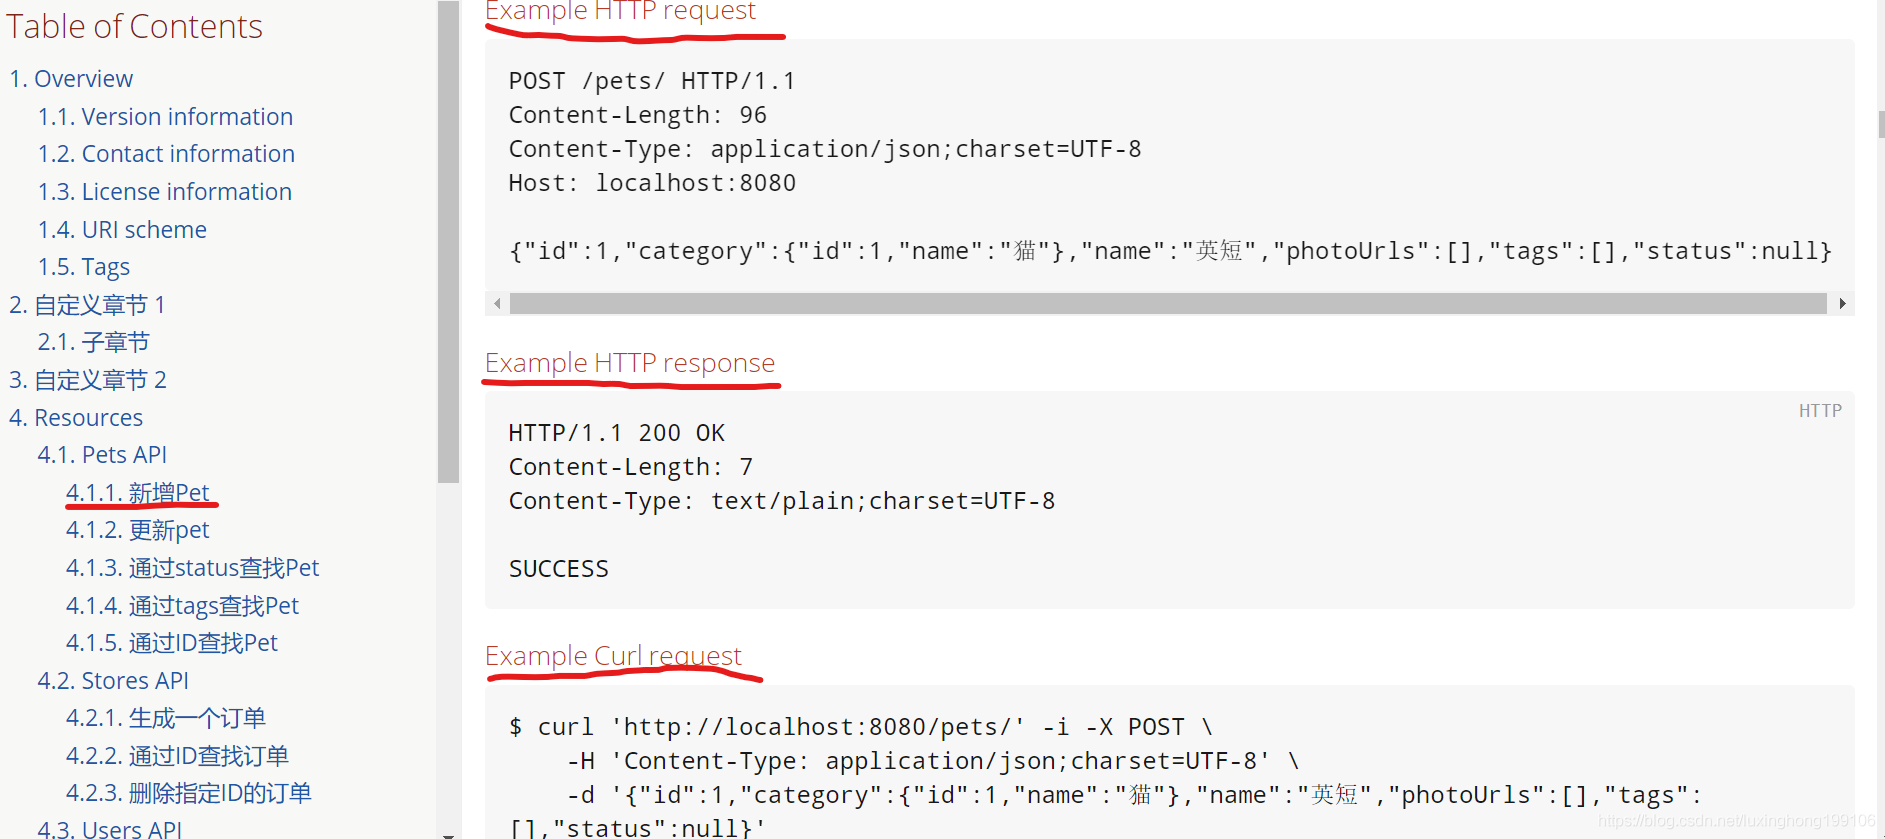
可以看到请求和响应示例已经添加到最终的文档中了。
well,it’s done.